The original has an off-the-shoulder neckline which isn't really suitable for a little girl so if we make a wider "Bateau" neckline you can still get the effect.

I am using the "Princess" dress pattern from my Doll
Clothes Collection. It has a template for a full length bodice with a jewel neckline and puff sleeves.
The cutting edge of neckline in the pattern is the actual neckline edge as it was meant to be bound with bias so you don't have to remove any Seam Allowances in this area.
You will, however, want to add Seam Allowance to the waistline of this template.
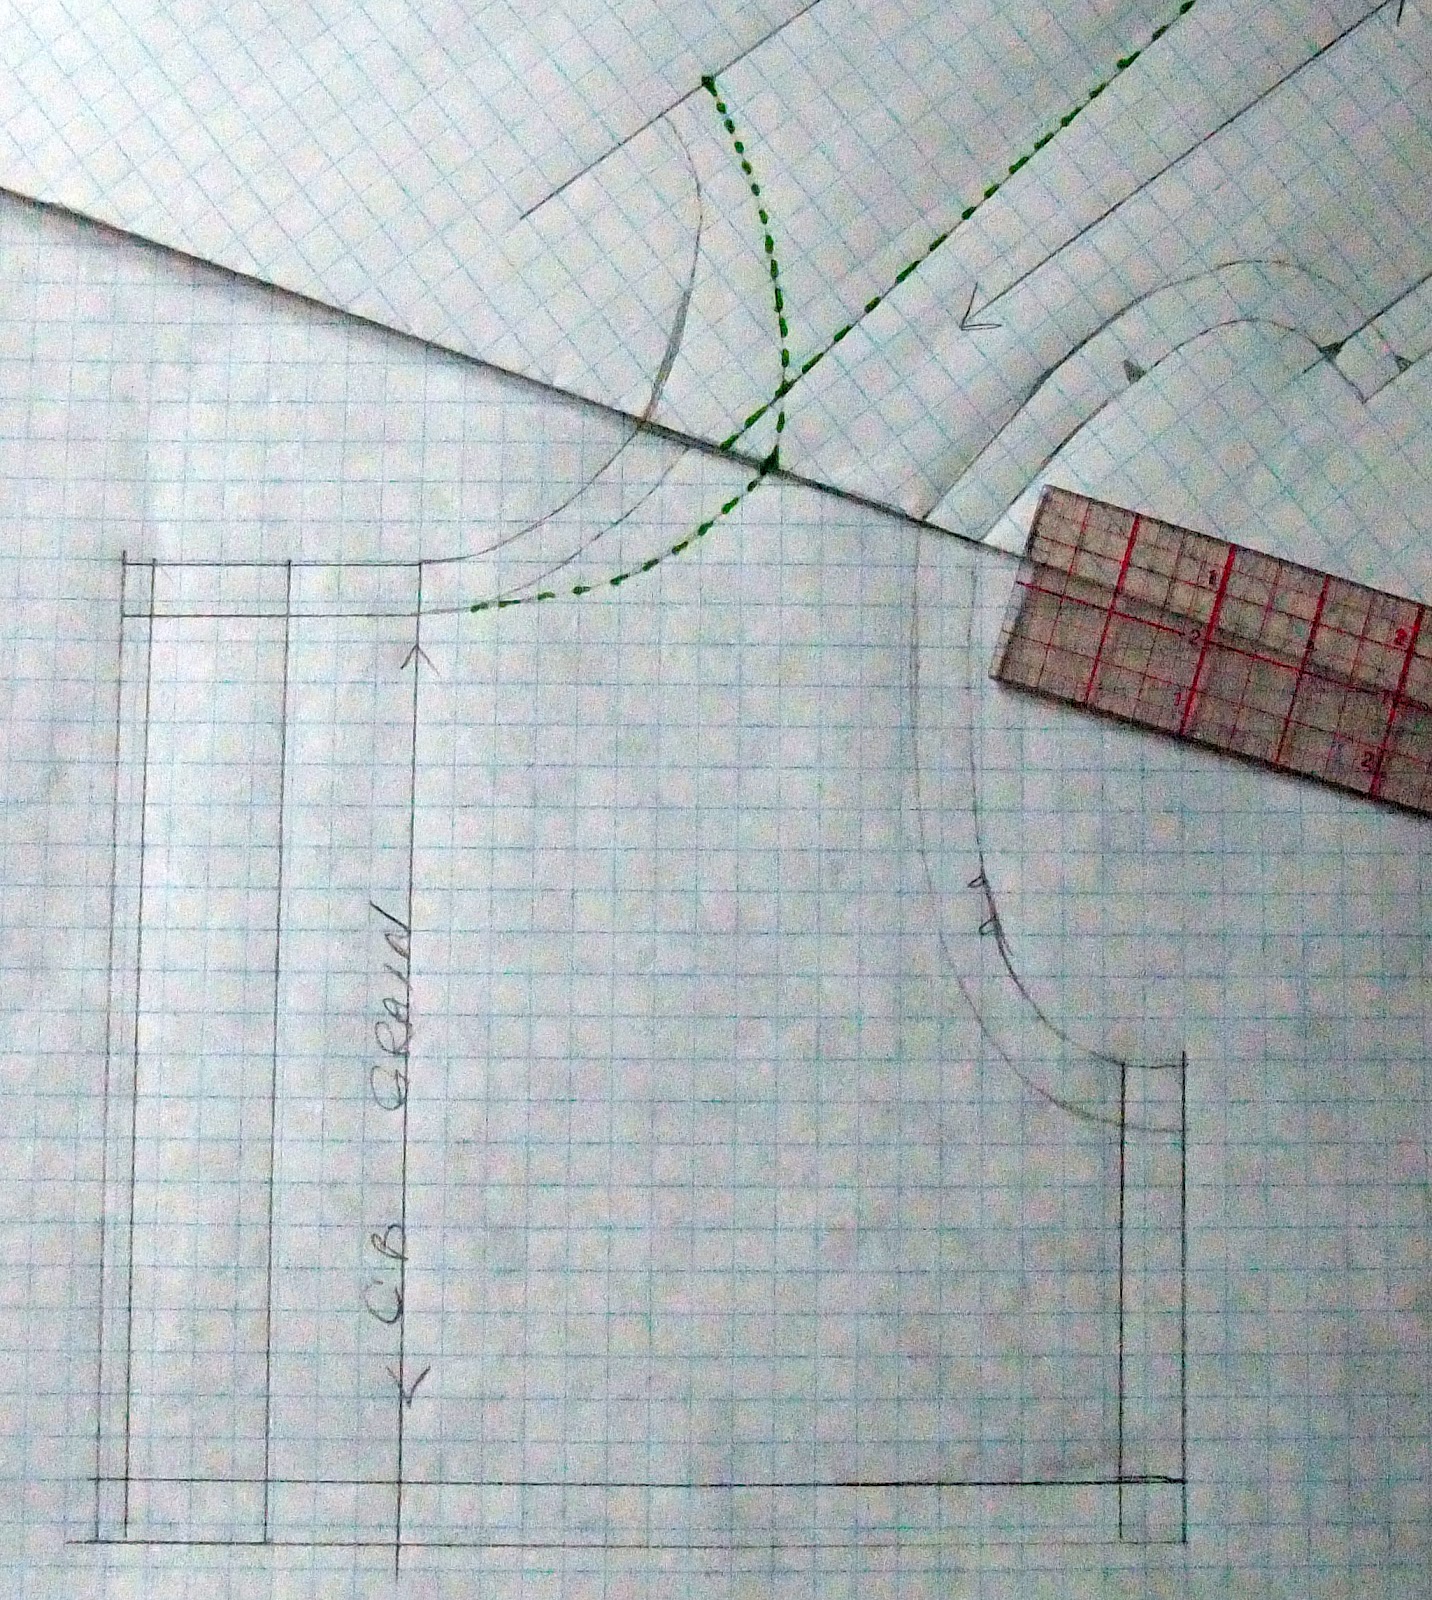
With your pattern you will want to mark in the finished neckline to make the changes.

I am working with half a pattern front at the moment.
So, draw a new neckline a bit lower and wider than the original.
Now you can determine the Princess Seam.
Find a point on the waistline that will not be too wide (about 1/4 to 1/3 of the front waist) and then mark a point on the new neckline that will give you a pleasing angle. With a pencil and ruler join these two points. Next mark a new grain line on the side bodice piece.
To do this measure from CF to a point on the side bodice near the top and near the bottom. Join these two points and add the arrows that indicate this is a grain line.
To the right you can see the new lines drawn in green.

edges. Again you can see the new lines have been drawn in green. You might write the names of the pattern pieces, the size and "Snow White Dress" for future reference.
The CF or fold line of my pattern piece is on the straight grain and will be marked when it becomes a full width pattern piece.
So there you have the front bodice alterations basically done.
Now you need to make the back neckline match!
Trace off the back bodice pattern as you did the front.
Go back to your first page of changes and fold the shoulder seam allowance to the wrong side so you can match up the shoulder seams as if you were going to sew them.
Draw in a new neckline so that it blends gently with the front neckline. I chose to keep the centre back neck at the same point as the original (it is a doll after all) but you might want to lower the pattern a wee bit for a child.

Next step is to add seam allowances to the new back neckline and the new armhole seam in the shoulder area.
Below you can see the pieces that were created.
All that is left to do is create the centre panel full width.

The easiest way to finish the neckline would be to clean line the whole bodice. This eliminates the need to finish the seam allowances and avoids little fingers getting caught in any of the carrying threads of the smocking on the inside of the bodice.
To test the fit and accuracy of the neckline and Princess seams, make a muslin of your new pattern to try on the child. Draw any changes right on the fabric and then transfer them to your paper pattern.
Piping the neckline would be a nice additional detail and of course you want to add a pretty lace edge.
Last but not least, the sleeves of Snow White's gown feature "cartridge" pleating. This is type of pleating that is seldom seem in clothing today. If your pattern has nice full puff sleeves you could get the effect of the cartridge pleats simply by creating box pleats.
So there you have it. And here is my challenge, send in your photos for posting if you dare to give it a try!
Till next time, keep stitching......
No comments:
Post a Comment