This style of zipper application is fairly new I think and came along with the advent of decorative zippers. You know, the ones with the rhinestone or decorative teeth.
You need to measure the width of the zipper from one side of the tape to the other and also the width of the area you wish to expose. You will need enough tape on each side of the zipper to allow attaching it to the garment securely.
Then you need to measure the length of the zipper teeth. To this you must add 1/4" plus the seam allowance at the top of the zipper. Note these measurements.
Stitch the garment seam closed and press the seam allowances open.
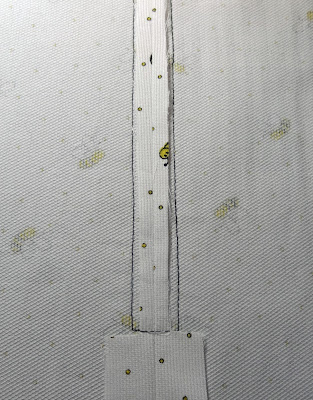
On the back of the garment, mark the length you recorded. This line must be at right angles to the seam. Now trim the seam allowance to ¼” or less for this length. Draw in your vertical stitching lines at 5/16" on either side of the seam. You should have a box drawn on the wrong side of your fabric. Check that you can still catch the zipper tape on either side if you cut this box.
Cut a 'lining' or 'facing' to back the zipper placket about twice the width of the zipper and approximately 2" longer than the length measure you recorded. Apply an iron-on interfacing to the wrong side of this piece and finish the raw edges. Lightly press this 'facing' in half lengthwise to mark the centre.
 |
| Box stitched, seam allowance trimmed |
From the wrong side, machine stitch on the vertical guide line, down one side, across the bottom and up the other side. Press lightly.
Cut out
the centre of the ‘placket’ leaving a narrow seam allowance. Cut into the corners to get a good sharp turn. Press, then turn the ‘facing’ to
the wrong side of the garment. You have just created the “Slot” for your
zipper.
Now you
will position the zipper behind the slot and hand baste it in place. Pin first.
The zipper stopper should be about ¼” above the bottom of the slot end. Pin the zipper tapes
together so they touch but don’t overlap.
 |
| Box trimmed out and corners clipped |
 |
| Facing turned to wrong side and pressed |
With your zipper foot (or if there is room to work use your 'edge joining' foot) machine stitch along the very edge of the ‘placket’ to secure the zipper in place. You can start with the zipper open and as you approach the zipper pull, leave the needle in the fabric, lift the machine foot and close the zipper. Stitch to the end of the ‘placket’, leave the needle in the fabric, lift the foot, pivot, drop the foot and start up the second side. Stop at least half way up with the needle in the fabric, open the zipper and finish stitching the length of the placket. Remove basting stitches.
For extra
security you can stitch the zipper to the placket ’facing’ by lifting the
garment and stitching through only the zipper tape and the ‘facing’ if there is
room. If you wish and the style of garment allows it you could alternatively
top stitch either side of the zipper with a second row of stitching about ¼”
away (if this second row of stitching will catch the zipper tape on the wrong
side). You could do this with a decorative stitch if you so wish.
Hope this has been inspiring and that you give a slot zipper a try!
Till next time, keep stitching.....
Hope this has been inspiring and that you give a slot zipper a try!
Till next time, keep stitching.....


